Building a Home Theater Computer
Ever wanted to build a kick-ass home theater computer? Here we have some highly detailed instructions for putting together just such a device. It is not a DVR like TiVo or your Verizon HDTV box. It is not an el cheapo digital video player you can order on eBay for a hundred bucks. What we have here is a serious machine that can play every imaginable audio and video format without skipping frames, freezing, or crashing. You guessed it: it doesn’t use Windows.
There are a lot of blogs out there with people bragging about building their Linux-based HTPCs. Unfortunately, the process is not simple and requires considerable Linux expertise. Of course, you can do what most technically-challenged home theater enthusiasts have done: buy a computer and load Windows Media Center on it. But why would you want to spend all that time and money on something that most definitely will suck? What we offer you here is a design for a Linux HTPC box using XBMC that has been thoroughly tested. We would never claim that anything computer-related can be entirely bug-free. That would be just crazy. But this particular design has been around the block a few times and is much more polished than something you would put together on your own.
System specifications
CPU: 2 x 3.0GHz
RAM: 2Gb (4Gb max)
DISK: 160Gb OS + 1Tb Storage, no RAID
VIDEO: Radeon 4550
AUDIO: onboard 7.1 coax, optical
DVD: CD/DVD DL burner
REMOTE: BT PS3 Remote
Hardware
RaidMax Icecube case $90
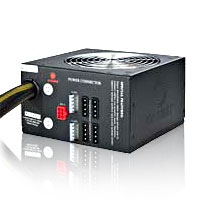
CoolMax CU-700B 700W Power Supply $60
ASUS P5KPL-CM mATX motherboard $50
2 x 1Gb PNY PC-5300 DDR2 $30
Intel Core 2 Duo E8400 $160
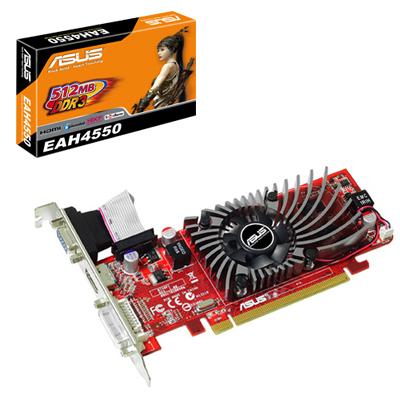
ATI Radeon 4550 PCI-E Video Card $70
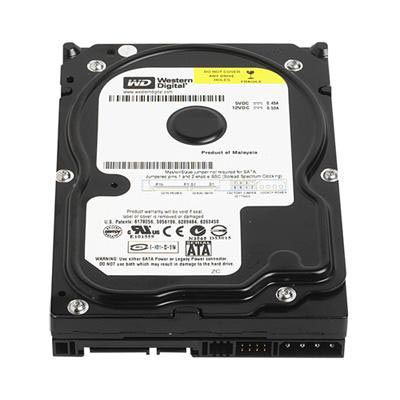
WD 160Gb SATA 3 HD $50
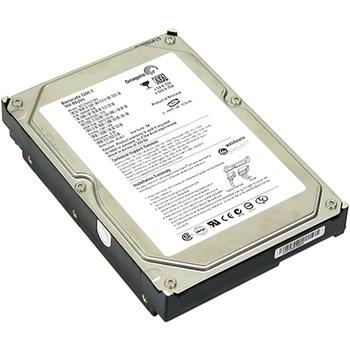
Seagate 1Tb SATA 3 HD $80
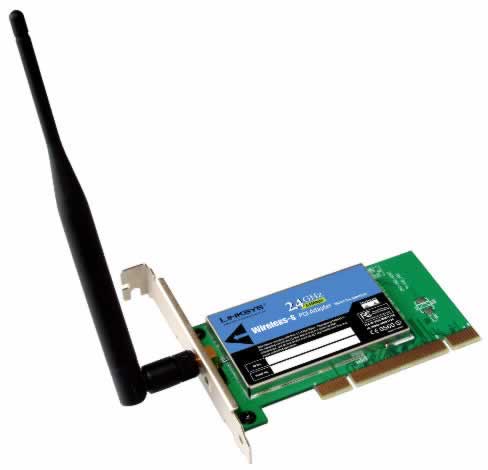
LinkSys W54g PCI NIC $25
CD/DVD-RW DL SATA $30
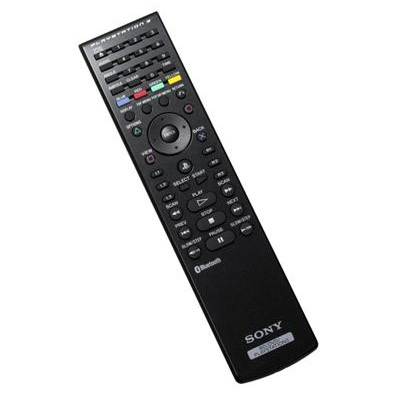
Sony PS3 BD Remote $20
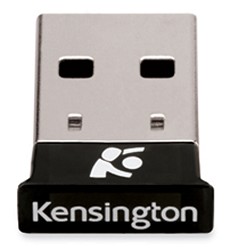
Kensington USB Bluetooth Micro Adapter $25
Total hardware cost: ~ $700
Software
OpenSUSE 11.1 i586
XBMC 1.0stable-5.pm.9 (i586)
MPlayer 1.0rc2_r27637-3.pm.3 (i586)
ALSA 1.0.18.git20090106-1.1 (i586)
PulseAudio 0.9.12-9.6 (i586)
Samba 3.2.4-5.2 (i586)
Pure-FTPd 1.0.21-182.27 (i586)
Apache2 2.2.10-2.5 (i586)
NFSd 1.1.3-14.1 (i586)
MySQL 5.0.67-12.11 (i586)
Assembly instructions
The RaidMax Icecube case worked out very well for our needs. True, it doesn’t look like a home theater component and you should feel free to go with a case that best suits your aesthetic needs and if you need a monitor for you computer, using the bestbezellessmonitor site could be a great option to finish a new computer.. The Icecube case is particularly well-suited for liquid cooling. This may be a plus if you need to a have a very quiet system. Be careful when working with the case’s internal aluminum chassis: it is a bit flimsy.
Upgrade BIOS on the motherboard
These instructions are specifically for the Asus P5KPL-CM mATX motherboard.
Download the latest Asus BIOS installer for Linux (AFU236U.exe) and the latest BIOS revision (P5KPL-CM-ASUS-0517.ROM):
http://support.asus.com/download/download.aspx?SLanguage=en-us&model=P5KPL-CM&type=map&f_type=21Unzip them into root home: /root. You will need one blank CD-R.
wget http://www.fdos.org/bootdisks/autogen/FDOEM.144.gz
gunzip FDOEM.144.gz
modprobe vfat
modprobe loop
mkdir /tmp/floppy
mount -t vfat -o loop FDOEM.144 /tmp/floppy
cp /root/AFU236U.exe /root/P5KPL-CM-ASUS-0517.ROM /tmp/floppy
df -h /tmp/floppy # Double check that the files weren't too big for /tmp/floppy
umount /tmp/floppy
mkisofs -o bootcd.iso -b FDOEM.144 FDOEM.144
cdrecord -v bootcd.iso
Reboot from CD, reflash the BIOS, remove the CD and reboot again.
Install Samba, Pure-FTPd, Apache2, NFSd, MySQL
Install and configure uShare
Download and install uShare:
http://software.opensuse.org/ymp/home:jirislaby/openSUSE_11.1/ushare.ympSample configuration file is below. Modify at least: USHARE_NAME, USHARE_IFACE, and USHARE_DIR.
# /etc/ushare.conf
# Edit this file with 'dpkg-reconfigure ushare'
# Configuration file for uShare

# uShare UPnP Friendly Name (default is 'uShare').
USHARE_NAME=ICEBOX

# Interface to listen to (default is eth0).
# Ex : USHARE_IFACE=eth1
USHARE_IFACE=wlan0

# Port to listen to (default is random from IANA Dynamic Ports range)
# Ex : USHARE_PORT=49200
USHARE_PORT=

# Port to listen for Telnet connections
# Ex : USHARE_TELNET_PORT=1337
USHARE_TELNET_PORT=

# Directories to be shared (space or CSV list).
# Ex: USHARE_DIR=/dir1,/dir2
USHARE_DIR=/mymedia/xbmc/

# Use to override what happens when iconv fails to parse a file name.
# The default uShare behaviour is to not add the entry in the media list
# This option overrides that behaviour and adds the non-iconv'ed string into
# the media list, with the assumption that the renderer will be able to
# handle it. Devices like Noxon 2 have no problem with strings being passed
# as is. (Umlauts for all!)
#
# Options are TRUE/YES/1 for override and anything else for default behaviour
USHARE_OVERRIDE_ICONV_ERR=

# Enable Web interface (yes/no)
ENABLE_WEB=yes

# Enable Telnet control interface (yes/no)
ENABLE_TELNET=no

# Use XboX 360 compatibility mode (yes/no)
ENABLE_XBOX=yes

# Use DLNA profile (yes/no)
# This is needed for PlayStation3 to work (among other devices)
ENABLE_DLNA=yes
Adding multi-threading to uShare
By default, uShare will allow a single client connection at a time. This limitation can be removed by making a small change to libupnp library used by uShare. Download the latest libupnp source from:
http://pupnp.sourceforge.net/Decompress and untar. Cd into ./lib*/upnp/src/api and edit “upnpapi.c”. Locate this string:
TPAttrSetMinThreads( &attr, MIN_THREADS );And replace “MIN_THREADS” with a numeric value of the desired number of simultaneous clients (4 is recommended). Now cd back into ./lib*/ and run ./configure, make, make install.
Now just copy ./lib*/upnp/.libs/libupnp.so.3.0.5 to /usr/lib, overwriting the old file.
Install MPlayer and SMPlayer frontend
http://packman.links2linux.org/install/mplayer
http://packman.links2linux.org/install/smplayer
http://packman.links2linux.org/install/smplayer-themes
http://packman.links2linux.org/install/mplayerthumbs
http://packman.links2linux.org/install/mplayerplug-in
ALSA update
zypper ar http://download.opensuse.org/repositories/multimedia:/audio/openSUSE_11.1/ multimedia
zypper install alsa alsa-utils alsa-oss alsa-plugins alsa-plugins-pulse alsa-tools alsa-firmware libasound2
zypper rr multimedia
zypper ar http://download.opensuse.org/repositories/multimedia:/audio:/KMP/openSUSE_11.1/ multimedia
zypper install alsa-driver-kmp-default
zypper rr multimedia
PulseAudio configuration
Edit /etc/pulse/daemon.conf and add:
high-priority = yes
nice-level = -11
realtime-scheduling = yes
realtime-priority = 8
For better MP3 quality also add the following line, although this may cause choppy sound when playing DVDs:
resample-method = src-sinc-best-qualityIn PulseAudio Preferences select “Speakers” -> “Speaker Layout” -> 7.1
And restart PulseAudio:
killall pulseaudio ; sleep 1 ; /usr/bin/esd&
Remove PulseAudio
PulseAudio is a relatively new piece of software integrated into the OpenSUSE 11 and later versions. It is a networked sound server that acts as an intermediary between ALSA driver and the application. PulseAudio adds an extra layer of complexity to the audio setup and is known to be a bit of a CPU hog, sometimes resulting in crackling sound during MP3 and DVD playback. There is a way to completely disable PulseAudio in OpenSUSE 11.x and to replace it with the older, more stable and less demanding esounD
Go to YaST -> Hardware -> Sound -> Sound -> PulseAudio Configuration and uncheck PulseAudio. Stop all sound-enabled applications and kill any running PulseAudio processes:
killall pulseaudioUsing YaST software manager, uninstall everything matching pulseaudio* string. Also uninstall alsa-plugins-pulse. Instead, install esound-daemon, esound-utils, libmpg123-0-esound. Restart your Gnome session for the change to take effect.
Adjusting volume levels
There are three or four layers to volume control: hardware, ALSA, desktop environment, PulseAudio/OSS. First, adjust hardware volume: YaST -> Hardware -> Sound -> Other -> Volume. Next, in a terminal window run:
alsamixer -D hw:0Make necessary adjustments and hit Escape. The final step is to run PulseAudio Volume Control or the (desktop) Volume Control, if PulseAudio is not installed.
Restoring mixer levels after reboot
After every reboot, ALSA will restore previous mixer settings, saved at the last shutdown. To save custom settings that would be automatically loaded by ALSA during boot, run the following command:
/usr/sbin/alsactl storeTo restore these settings, run:
/usr/sbin/alsactl restoreAlternatively, you may save several different mixer layouts by running:
/usr/sbin/alsactl -f /etc/alsamixer_1.conf store
/usr/sbin/alsactl -f /etc/alsamixer_1.conf restore
...
You can set specific ALSA mixer configuration to load at boot by editing /etc/init.d/alsasound
XBMC Install
http://packman.links2linux.org/install/XBMC
Configure XBMC RSS ticker
Edit /root/.xbmc/userdata
Resolve XBMC fullscreen slow mouse bug
This problem with lag in mouse response is actually not caused by XBMC, but by Xorg drivers. Set the following system variable in user profile, under which XBMC is started:
export SDL_VIDEO_X11_DGAMOUSE=0
Resolve XBMC DVD eject issue
Sometimes XBMC mounts a CD/DVD and will not eject it. Edit /etc/sysctl.conf and add the following lines. Reboot computer for the change to take effect.
# enable dvd unmounting in xbmc
dev.cdrom.lock=0
Disable CD autoplay in Gnome
Open Nautilus -> Edit -> Preferences -> Media -> un-check “Browse media…” and check “Never prompt…”
Install codecs
Use YaST to download and install appropriate codecs from this URL:
http://opensuse-community.org/codecs-gnome.ymp
Alternatively, use zypper to install codecs one at a time:
zypper in ffmpeg
zypper in flash-player
zypper in gst-fluendo-mp3
zypper in java-1_5_0-sun-plugin
zypper in k3b-codecs
zypper in libdvdcss
zypper in libxine1
zypper in w32codec-all
Enable front panel headphones
For Gnome run:
/usr/bin/gnome-volume-controlIn the “Options” tab set “Independent HP” to “OFF”
After any Gnome or YaST changes to audio settings, restart PulseAudio server:
killall pulseaudio ; sleep 1 ; /usr/bin/esd&
Install and configure ATI Radeon HD 4550 PCI-E video card
The Radeon HD 4550 card does not use external power connectors – it draws power from the PCI-E16 connection on the motherboard. Poweroff the system, install the card, connect monitor to the 4550 card and start the system. Enter BIOS setup and in Advanced -> North bridge configuration disable onboard video (optional).
When OpenSUSE 11.1 boots for the first time with the new card, it will complain about unrecognized display mode. It will show you a list of supported modes and you will need to make a selection. Select resolution within the range of your monitor (1600x1200x24 for the 24″ Dell). In YaST -> Software -> Software Repositories add a new HTTP repository:
Name: ATI Video
Protocol: HTTP
Server name: www2.ati.com
Directory on server: /suse/11.1
Authentication: anonymousIn YaST -> Software -> Software Management install the following two packages:
ati-fglrxG01-kmp-default
ati-fglrxG01-kmp-paeMake a copy of the X11 configuration file:
cp -p /etc/X11/xorg.conf /etc/X11/xorg.conf.`date '+%y-%m-%d'`Run ATI configuration utility:
aticonfig --initial --input=/etc/X11/xorg.confNow force SAX2 to use the new ATI driver:
sax2 -r -m 0=fglrxWhen SAX2 opens, make sure that ATI driver is listed in the “Graphics card” section and select the appropriate resolution. Restart X window manager by pressing CTRL+ALT+BACKSPACE twice. It will take 3-20 seconds. Alternatively, reboot the system.
Alternatively, use OpenSUSE one-click install feature:
http://opensuse-community.org/ati.ympOpen a terminal and type:
sax2 -r -m 0=fglrxThis will configure X to use the ATI driver. Restart X window manager by pressing CTRL+ALT+BACKSPACE twice. It will take 3-20 seconds. Alternatively, reboot the system.
Verify that the driver module is loaded in kernel:
modinfo fglrx | grep -v alias

filename:       /lib/modules/2.6.27.7-9-pae/updates/fglrx.ko
license:        Proprietary. (C) 2002 - ATI Technologies, Starnberg, GERMANY
description:    ATI Fire GL
author:         Fire GL - ATI Research GmbH, Germany
depends:        built-in,built-in,built-in,built-in,built-in,agpgart,built-in,built-in,built-in,built-in,built-in,built-in,built-in,built-in,built-in
supported:      external
vermagic:       2.6.27.7-9-pae SMP mod_unload modversions 586
parm:           firegl:charp
Resolving XBMC horizontal tearing issue during video playback
Once proper video driver has been installed and activated, start XBMC and in Settings -> Appearance -> Screen -> Vertical Blank Sync select “Let Driver Choose” and restart XBMC.
Running XBMC without desktop manager
Assuming XBMC user is “xbmc” with home group “users” and has a home directory in /home/xbmc, create /home/xbmc/.xinitrc
#!/bin/sh
while true
do
        /home/xbmc/start_xbmc.sh
done
chown xbmc:users /home/xbmc/.xinitrc chmod 755 /home/xbmc/.xinitrcCreate /home/xbmc/start_xbmc.sh
#!/bin/sh
sleep 3
export SDL_VIDEO_X11_DGAMOUSE=0
startx & /usr/bin/xbmc --standalone -fs
And make these scripts executable:
chmod 755 /home/xbmc/start_xbmc.sh /home/xbmc/start_xbmc.shNOTE: the 3-second sleep time is there to make it easier to break out of the “while” loop. This option can be removed for the production version. The while loop ensures that X windows and XBMC are restarted as soon as they quit or crash.
Install MingeTTY:
zypper in mingettyOpen /etc/inittab and modify two lines:
id:3:initdefault:1:2345:respawn:/sbin/mingetty --autologin xbmc --noclear tty1This will change the default startup level to “init 3” and will automatically log in user “xbmc”. The “respawn” option will log the user back in, if he tries to log out or if the login session quits.
Backing up system hard drive
Install the ddrescue package:
zypper install ddrescueRun fdisk -l to get a list of available hard drive. In this example, the source hard drive is /dev/sda (160Gb) and the target drive is /dev/sdc (320Gb):
icebox:~ # fdisk -l

Disk /dev/sda: 160.0 GB, 160041885696 bytes
255 heads, 63 sectors/track, 19457 cylinders
Units = cylinders of 16065 * 512 = 8225280 bytes
Disk identifier: 0x000a2bbd

   Device Boot      Start         End      Blocks   Id  System
/dev/sda1               1         523     4200966   82  Linux swap / Solaris
/dev/sda2   *         524        9989    76035645   83  Linux
/dev/sda3            9990       19457    76051710   83  Linux

Disk /dev/sdc: 320.0 GB, 320072933376 bytes
255 heads, 63 sectors/track, 38913 cylinders
Units = cylinders of 16065 * 512 = 8225280 bytes
Disk identifier: 0x00000000

Disk /dev/sdc doesn't contain a valid partition table
Run dd_rescue command in verbose mode to copy all contents of the system disk to the backup disk. Keep in mind that dd_rescue will partition the target disk identical to the source disk. Therefore, the target disk must be the same size or larger than the source disk. If the target disk is larger, then there will be some unallocated space left on it after the dd_rescue completes.
icebox:~ # dd_rescue -v /dev/sda /dev/sdc
dd_rescue: (info): about to transfer 0.0 kBytes from /dev/sda to /dev/sdc
dd_rescue: (info): blocksizes: soft 65536, hard 512
dd_rescue: (info): starting positions: in 0.0k, out 0.0k
dd_rescue: (info): Logfile: (none), Maxerr: 0
dd_rescue: (info): Reverse: no , Trunc: no , interactive: no
dd_rescue: (info): abort on Write errs: no , spArse write: if err
dd_rescue: (info): ipos:  22164480.0k, opos:  22164480.0k, xferd:  22164480.0k
                   errs:      0, errxfer:         0.0k, succxfer:  22164480.0k
             +curr.rate:   109639kB/s, avg.rate:    53725kB/s, avg.load:  9.2%
...
dd_rescue: (info): /dev/sda (156290904.0k): EOF
Summary for /dev/sda -> /dev/sdc:
dd_rescue: (info): ipos: 156290904.0k, opos: 156290904.0k, xferd: 156290904.0k
                   errs:      0, errxfer:         0.0k, succxfer: 156290904.0k
             +curr.rate:    70796kB/s, avg.rate:    47053kB/s, avg.load:  9.0%
SATA-to-SATA transfer rate on the same controller will be around 50Mb/s, thus it will take about one hour to copy a 160Gb disk.
If you run fdisk again, you will see that the partitions on the new drive look identical to the old drive:
icebox:~ # fdisk -l

Disk /dev/sda: 160.0 GB, 160041885696 bytes
255 heads, 63 sectors/track, 19457 cylinders
Units = cylinders of 16065 * 512 = 8225280 bytes
Disk identifier: 0x000a2bbd

   Device Boot      Start         End      Blocks   Id  System
/dev/sda1               1         523     4200966   82  Linux swap / Solaris
/dev/sda2   *         524        9989    76035645   83  Linux
/dev/sda3            9990       19457    76051710   83  Linux

Disk /dev/sdc: 320.0 GB, 320072933376 bytes
255 heads, 63 sectors/track, 38913 cylinders
Units = cylinders of 16065 * 512 = 8225280 bytes
Disk identifier: 0x000a2bbd

   Device Boot      Start         End      Blocks   Id  System
/dev/sdc1               1         523     4200966   82  Linux swap / Solaris
/dev/sdc2   *         524        9989    76035645   83  Linux
/dev/sdc3            9990       19457    76051710   83  Linux
A faster and simpler way to copy the disk is to just use “dd”. Keep in mind that this method will not work if your source hdd has any bad blocks:
icebox:~ # dd if=/dev/sda of=/dev/sdc bs=64kThe advantage of using dd_rescue is ability to relatively quickly bypass bad blocks and minimize data loss. By default, dd_rescue will use 64k block size for the dd operation. If it encounters a bad block, it will switch to 512b block size, until it clears the bad sector. Then it will go back to 64k.
The next step is to ensure that you can mount the new disk. Recent Linux versions use the disk UUID numbers instead of the usual /dev/sda-type addresses to specify partition paths in /etc/fstab. Every time you replace the disk, create or resize partitions, the UUID of the partition will change. Take a look at the /etc/fstab:
icebox:~ # more /etc/fstab
/dev/disk/by-id/ata-WDC_WD1600AAJS-00B4A0_WD-WCAT21409902-part1 swap                 swap       defaults              0 0
/dev/disk/by-id/ata-WDC_WD1600AAJS-00B4A0_WD-WCAT21409902-part2 /                    ext3       acl,user_xattr        1 1
If you just swap old disk with the new, you system will not boot if the fstab uses UUID paths. Using partition UUIDs is how Linux compensates for having an inferior (in comparison to Unix) disk device addressing convention. In Solaris, for example, a partition name will look like: c0t0d0s0 – controller “0”, target “0”, disk “0”, slice “0”. This is more logical, useful and robust than the nondescript “sda0”. UUIDs are helpful to users with short-term memory problems. To sysadmins UUIDs are just annoying. It’s always a better practice to keep track of your hdd locations and controller assignments, than to rely on the buggy OS to do it for your. The first step is to return your fstab to the traditional Linux device path notation and just pay attention the next time you decide to swap disks or controllers. The /etc/fstab above should look like this:
icebox:~ # more /etc/fstab
/dev/sda1 swap                 swap       defaults              0 0
/dev/sda3 /                    ext3       acl,user_xattr        1 1






![Plundering Facebook Photo Albums wyryr1sn52gntzn65v4fpz5lc6v[1]](https://i2.wp.com/www.krazyworks.com/wp-content/uploads/2021/08/wyryr1sn52gntzn65v4fpz5lc6v1-80x80.jpg)
![Scraping a Web Page in Bash clfud46mxf2t5zph2l04zlpgl1d[1]](https://i2.wp.com/www.krazyworks.com/wp-content/uploads/2021/08/clfud46mxf2t5zph2l04zlpgl1d1-80x80.jpg)
![Processing Videos with ffmpeg and Lightroom DSCF5361[1]](https://i1.wp.com/www.krazyworks.com/wp-content/uploads/2020/10/DSCF53611-80x80.jpg)
![Searching Twitter Cat-Devouring-A-Bird-Pablo-Picasso[1]](https://i0.wp.com/www.krazyworks.com/wp-content/uploads/2020/10/Cat-Devouring-A-Bird-Pablo-Picasso1-80x80.jpg)
![Generating Random Text Files for Testing 91ebozy1e3b138waujy28agrngy[1]](https://i2.wp.com/www.krazyworks.com/wp-content/uploads/2021/08/91ebozy1e3b138waujy28agrngy1-80x80.jpg)
![Finding Cron Jobs iwoau71okwxqh4jv3k4ook32qps[1]](https://i2.wp.com/www.krazyworks.com/wp-content/uploads/2021/08/iwoau71okwxqh4jv3k4ook32qps1-80x80.jpg)
![Understanding Memory Utilization in Linux 5gtysva4wkc8mzc1k3e66vaycxx[1]](https://i1.wp.com/www.krazyworks.com/wp-content/uploads/2021/08/5gtysva4wkc8mzc1k3e66vaycxx1-80x80.jpg)
![Validating HTTPS Cache Peers for Squid sy2zeb1vp2h8itlxfbbylw0jrm0[1]](https://i0.wp.com/www.krazyworks.com/wp-content/uploads/2019/12/sy2zeb1vp2h8itlxfbbylw0jrm01-80x80.jpg)
![Verifying SNMP Connectivity on Multiple Hosts Photo-2019-10-07-14-39-03_0266[1]](https://i1.wp.com/www.krazyworks.com/wp-content/uploads/2019/11/Photo-2019-10-07-14-39-03_02661-80x80.jpg)

Thanks for the really good steps, mostly for the part of starting xbmc without window manager, my htpc is up and running, Suse 11.1.
Saludos desde México.
Thanks a lot for your article. It really save my life^^
Im looking for speakers for my dorm room that include tweeters and a subwoofer. I want to connect these speakers to my ipod and not a home theatre system. I don’t want speakers too powerful either where I would have to buy an amp. Im looking to spend around $100.
Please include specific models and how I could connect them to an ipod thanks.
My computer monitor has a HDMI port but i doubt i can just connect a HDMI cable from my PS3 and to my monitor.. So I would need a HDMI to DVI cable right? And how would i connect my speakers to my PS3 for sound?
What Media Center Computer should I buy for hooking up to my HDTV?
Desired:
Home Server
DVR Capability
Play downloaded Blu Rays
Wireless Streaming
Hook up to HDTV: HDMI Out
Able to play Blu-Rays/DVDs of all regions
Fax/Voice Mail boxes ability?
I just want a Media Center computer. What should I buy???
Does this sound right? I use optical cable from tv to a RCA RTD317W home theater system w/ a built-in dvd player, xbox to the tv with HDMI, Computer to tv using VGA, The RCA to projector with HDMI. Am I missing anything? Also is there a way to switch between the component that will play on the projector and through the speakers? The reason why I as is I recently bought a sony dvd home theater system and i could only view video when a dvd was playing on the projector. When I would change to the tv or xbox it did not play on the projector and I couldn’t figure out how to get it to so I returned it.
I have seen DVI to HDMI, but I’m curious if you can convert DVI (like from a computer) to s-video, composite (RCA), or component. I have seen some component adapters but they are only for certain ATI video cards.
I’m curious because I want to build a Home Theater PC and the motherboard I like has DVI and HDMI, but I do not have a DVI or HDMI tv, only an HDTV with svideo, composite, and component. Thanks!
I am looking for a budget home theater projector that i will be running my ps3 and xbox 360 through and maybe a computer, i want as good a picture as i can get for as little as possible. this will be set up in my bed room so it does not really need to be projecting that far maybe like 8-10 ft or more, need help… thank you p.s. a tip and a good cheaper saround sound system 5.1
i want the projector to have hdmi ports
I am seeking for international investment for my business, as I would like to build Manufacturing and Assembling Plants (Factory) for Electronic Consumer goods and Computer peripherals products to distribute in Africa. We envision manufacturing CRT TV Sets from 14″ to 34″, TFT/LCD TV Sets and Computer Monitors, Plasma TV Sets; Home Theatre Systems, DVD Video Players, etc; Computers and its peripherals for distribution in Africa and its surrounding Islands.
I work in a theater and currently we have some large panels in the air which we are getting static electric shocks from them almost constantly; and while its not much than a nuisance, we’re all curious about whats happening. The panels are approx 20 feet tall and 9 feet wide and framed with steel and are completely covered with a thin, loosely woven cotton cloth (You can see through it pretty easily). The panels hang from a suspended track in the grid and are free to swing a little. Does anyone have a suggestion?